We have started a series of articles on tips and tricks for data scientists (mainly in Python and R). In case you have missed:
R
1.How To Write File Paths
If we want to write file paths that work in every operating system, like Linux, OS, Microsoft, we can work with the file.path() command. Let’s say that I want to add a directory called models under my current working directory:
file.path(getwd(),"models")
2.How To Repeat Vectors
The rep function allows us to repeat R vectors by specifying how many times we want to repeat the whole vector, or how many times we want to repeat each element of the vector.
Repeat a Vector n times
Assume that our vector is the x<-c(1,2,3,4,5) and we want to repeat it 3 times:
x<-c(1,2,3,4,5)
rep(x,times=3)
Output:
[1] 1 2 3 4 5 1 2 3 4 5 1 2 3 4 5
Repeat each Vector Element n times
Let’s say that we want to repeat each vector element 3 times:
x<-c(1,2,3,4,5)
rep(x,each=3)
Output:
[1] 1 1 1 2 2 2 3 3 3 4 4 4 5 5 5
3.How To Circular Shift Vectors
We have provided a tip of how to circular shift lists in Python. Let’s see how we can do it in R by building our custom function.
custom_roll <- function( x , n ){
  if( n == 0 | n%%length(x)==0) {
    return(x)
    }

  else if (abs(n)>length(x)) {
  new_n<- (abs(n)%%length(x))*sign(n)
  return(c( tail(x,new_n) , head(x,-new_n) ))
  }
  else {
  return(c( tail(x,n) , head(x,-n) ))
  }
}
Let’s see what we get but taking into consideration the vector (1,2,3,4,5).
x<-c(1,2,3,4,5)
custom_roll(x,-11)
Output:
[1] 2 3 4 5 1
Or another example:
x<-c(1,2,3,4,5)
custom_roll(x,12)
Output:
[1] 4 5 1 2 3
Or a simpler example:
x<-c(1,2,3,4,5)
custom_roll(x,1)
Output:
[1] 5 1 2 3 4
Python
4.How To Get The Code of a Function
Assuming that you have loaded a function but you do not know the code. We will provide an example of how you can get the source code. Assume that we have the following function:
def my_addition(a,b):
    return a+b

my_addition(5,6)
Output:
11We can get the source code by using the inspect module:
import inspect
lines = inspect.getsource(my_addition)
print(lines)
And we get the source code of the function:
def my_addition(a,b):
    return a+b
5.How to Remove Elements from a Numpy Array based on a Value
Let’s say that we have a numpy array and we want to remove all the elements which are equal to a specific value. Below, we will remove all the elements which are equal to 5.
import numpy as np

myarr = np.array([1,2,3,4,5,1,2,3,4,5])
myarr
array([1, 2, 3, 4, 5, 1, 2, 3, 4, 5])
Remove all the elements which are equal to 5
# remove all the elements which are equal to 5
myarr = myarr[myarr!=5]
myarr
Output:
array([1, 2, 3, 4, 1, 2, 3, 4])
As we can see, we removed the 5 element from the array.
6.How to Generate a File Name that Includes the Creation Date
Let’s say that every single day, we have to generate a report, and we want to add as a suffix the creation date to the file name. Let’s see how we can do it. For convenience, the date will be of the form yyyymmdd since this allows us to sort the files based on file name achieving a sorting of creating date :
from datetime import datetime

mydate = datetime.now()
myfilename = "report_"+mydate.strftime('%Y%m%d')+".csv"
myfilename
Output:
'report_20210518.csv'
Note that we added the required extension of the file name. It could .txt etc or nothing in the case of a flat file.
Finally, we can add the time if we want as follows:
myfilename = "report_"+mydate.strftime('%Y%m%d-%H%M%S')+".csv"
myfilename
Output:
'report_20210518-133907.csv'
7.How to get the most recent Filename based on Creation or Modification Date
Let’s say that in your data directory you are dealing with many files and you want your script each time to read the most recent file. We will provide an example of how you can get the most recent file using the os module.
Note that we can either work with the creating date or with the modification date. In our example, we will keep track of both of them. Assume that our data are under the data directory and we want to read the file with the most recent modification date:

import os
import pandas as pd

my_files = os.listdir('data')
my_files
Output:
['file1.txt', 'file2.txt', 'file3.txt', 'file4.txt']
Now we will create a list of tuples of three elements, the filename, the creating_time and the modification_time.
creation_times = []
modification_times = []
for f in my_files:
    creation_times.append(os.path.getctime(os.path.join('data',f)))
    modification_times.append(os.path.getmtime(os.path.join('data',f)))

files_and_times = list(zip(my_files, creation_times, modification_times))
files_and_times
Output:
[('file1.txt', 1621337449.9179041, 1621337450.1148534),
 ('file2.txt', 1621337468.3333888, 1621337468.5313864),
 ('file3.txt', 1621337480.414948, 1621337486.8144865),
 ('file4.txt', 1621338525.3003578, 1621338525.5193233)]
Now, we want to get the most recent file name based on the modification time.
most_recent = sorted(files_and_times, key = lambda x:x[2], reverse=True)[0][0]
most_recent
And we get:
'file4.txt'
Finally, let’s read our most recent file. Note that we need to specify the full path.
df = pd.read_csv(os.path.join('data',most_recent))
df

8.How to get all Files from Directories and Subdirectories
Assume that you are in your working directory, and you want to get all the .jpg files from all directories and subdirectories under your current working directory. Let’s see how we can achieve that:
import os
import pandas as pd

# Set your root directory to be the current directory
root = os.getcwd()

image_names = []
paths = []
full_path = []
for path, subdirs, files in os.walk(root):
    for name in files:
        if name.endswith('.jpg'):
            image_names.append(name)
            # the "\\" is because I use windows. It will be "/" for OS and Linux
            paths.append(path.split("\\")[-1])
            full_path.append(os.path.join(path, name))

df = pd.DataFrame({'folder':paths, 'image':image_names, 'full_path':full_path})
Now your df data frame will have 3 columns, the folder, the image that refers to the file name of the images and the full_path of the image files.
SQL
9.How to get the key-value from JSON Objects in Postgres
Assume that the data column is of the form {"name":"George" , "surname":"Pipis"}. You can extract the value of each key as follows.
select data::json->'name' as name_col, data::json->'surname' as surname_col
from my_table
In case that you have a nested JSON like {"id": {"name": "George", "surname":"Pipis"} and you want to get the name and the surname you should write:
select data::json->'id'->>'name' as name_col, data::json->'id'->>'surname' as surname_col
from my_table
Postman
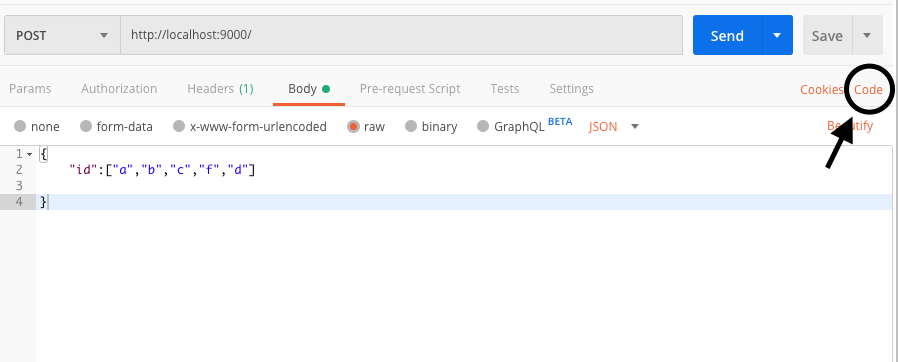
10.How to generate code for API calls from Postman
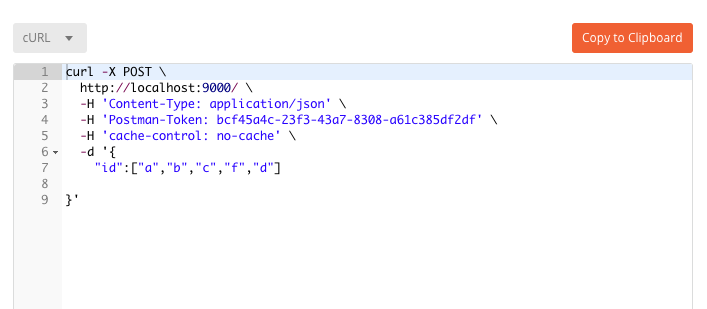
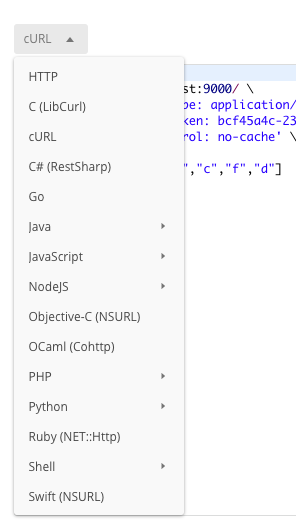
This handy feature of Postman can generate the code for every programming language. Just head over to the top right corner and press the “Code” as shown in the following picture.


