
This is a guide for a simple pipeline of a machine learning project. For this course, our target is to create a web app that will take as input a CSV file of flower attributes (sepal length/width and petal length/width) and returns a CSV file with the predictions (Setosa Versicolour Virginica). As you may already know, we will use the legendary Iris Dataset
The pipeline has 4 steps.
1. Create a new environment and install dependencies
I know that you want to skip this step but don’t. This will organize your packages and you will know exactly the packages you need to run your code incase we want to share it with someone else. Trust me, this is crucial. You don’t want your client to tell you “this is not running”. Also having our project in an environment will help us create the requirements file that we will need later very easily.
conda create -n iris_project

#activate your project
conda activate  iris_project
Install Dependecies
pip install pandas
pip install -U scikit-learn
pip install Flask
pip install gunicorn
Hack: If you are working with Jupyter you can install libraries directly from it by adding ‘!’ before every command inside a Jupyter cell.
2. Train and Save your ML model
Now the fun stuff. Create your model and save it in a file using pickle. For the sake of this post, we will create a logistic regression model using the Iris Dataset.
from sklearn import datasets
from sklearn.linear_model import LogisticRegression
import pandas as pd
iris = datasets.load_iris()

features=pd.DataFrame(iris['data'])

target=iris['target']

model=LogisticRegression(max_iter=1000)

model.fit(features,target)
Save the model using Pickle
import pickle

pickle.dump(model, open('model_iris', 'wb'))
3. Create the web App using Flask
Flask is one of the most useful technical skills you need to have as a Data Scientist. However, you don’t need to know everything about it. Just use blocks of codes as mockups for your project.
Let’s do some preparation. Create at your project directory a folder called templates and a folder called static. Inside the static folder create a folder named files. Next, create two .py files, the main.py, and iris_model.py. In the main.py will be our flask code and in the iris_model.py will be our model.
You can have this as a template and change it a bit to your needs. This is the way I personaly work.
main.py
from flask import Flask, render_template, request, redirect, url_for, send_file
import os

#we are importing the function that makes predictions.
from iris_model import predict_iris

import pandas as pd

app = Flask(__name__)
app.config["DEBUG"] = True


#we are setting the name of our html file that we added in the templates folder
@app.route('/')
def index():
    return render_template('index.html')

#this is how we are getting the file that the user uploads.
#then we are setting the path that we want to save it so we can use it later for predictions
@app.route("/", methods=['POST'])
def uploadFiles():
    uploaded_file = request.files['file']

    if uploaded_file.filename != '':
        file_path = ( "static/files/file.csv")
        uploaded_file.save(file_path)
    return redirect(url_for('downloadFile'))

#now we are reading the file, make predictions with our model and save the predictions.
#then we are sending the CSV with the predictions to the user as attachement
@app.route('/download')
def downloadFile ():
    path = "static/files/file.csv"
    predictions=predict_iris(pd.read_csv(path))
    predictions.to_csv('static/files/predictions.csv',index=False)
    return send_file("static/files/predictions.csv", as_attachment=True)

#here we are setting the port.
if (__name__ == "__main__"):
     app.run(debug=True,host='0.0.0.0', port=9010)
In this file we have our function that takes as input a dataframe with the features and outputs the predictions.
iris_model.py
from sklearn.linear_model import LogisticRegression
import pandas as pd
import pickle

#we are loading the model using pickle
model = pickle.load(open('model_iris', 'rb'))

def predict_iris(df):
    predictions=model.predict(df)
    df['predictions']=predictions
    return(df)
In the templates, folder create an index.html file with the following code inside. Again, no need to understand everything in this html, you can change the title and the heading or you can experiment with it more if you are familiar with HTML.
<!doctype html>
<html>
  <head>
    <title>Iris Prediction</title>
  </head>
  <body>
    <h1>Upload your CSV file</h1>
    <form method="POST" action="" enctype="multipart/form-data">
      <p><input type="file" name="file"></p>
      <p><input type="submit" value="Submit"></p>
    </form>
  </body>
</html>
Run the Web App locally
Now if you run the main.py in your terminal the app should start. Hit http://0.0.0.0:9010/ in your browser and you will have access to our app.
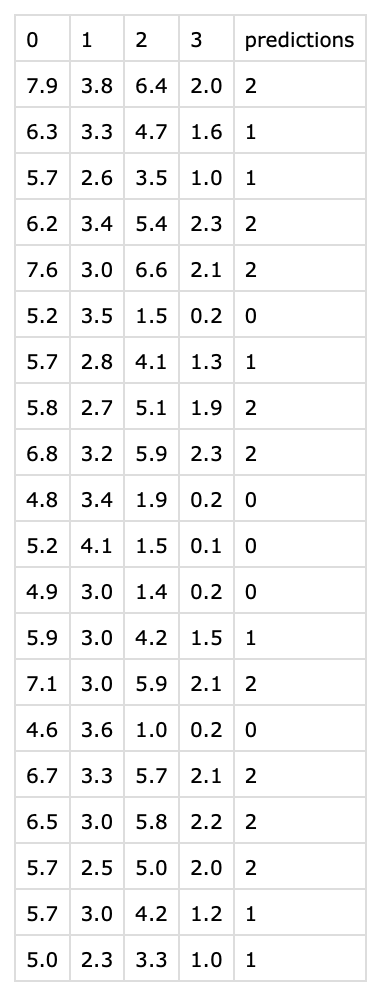
This is a very simple UI but we don’t need anything fancy. If you upload a sample file having the features of iris you will get the predictions.
Our web app is ready! Now we need somehow to deploy it so we can share it to the world. We will show you how to do it for free using Heroku.
Final Step: Deploy the Web App
Most of us don’t know how to move on from local to the live site and the word deployment may cause us to fear. Is this complex? Is this expensive? Well, no and no. We will show you how to do it very easily for free! There is a website called Heroku that offers you 5 free web app deployments. If you want a simpler but paid solution you can follow this guide using digital ocean.
Before we move on you need to create an account at Heroku and follow their instructions to install Heroku CLI to your machine. Also, be sure you have installed Git.
One critical step before we deploy our application is to create the requirements.txt file that contains the dependencies of our app. Luckily using Conda environments this is very easy to be done. Just run the following:
pip freeze > requirements.txtAlso we need to create a new file called Procfile that contains the command for our app to start. In our case we will use gunicorn so inside the file add the following
web: gunicorn main:app
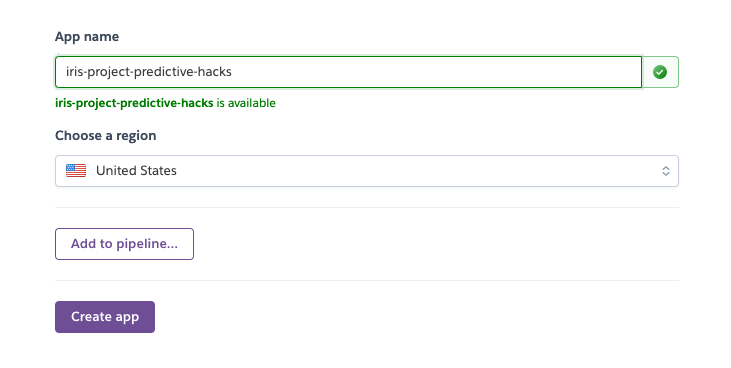
Next, go to your dashboard in Heroku and create a new app. The screen below will appear and you have to put the App name and the region.
After creating the app, go to your terminal and run the following to login to Heroku.
heroku loginThen, go to your project directory and run:
git init

#here you need to put the name of your app in heroku
heroku git:remote -a iris-project-predictive-hacks

git add .
git commit -m first_commit
git push heroku master
That was it! Your app is ready. It will give you a url like this https://iris-project-predictive-hacks.herokuapp.com/. Not so bad right?
This is a very simple way to do it. However, you can even deliver this app to a client as it is very functional and you don’t need anything more complex than this. The next step is to scale our application using e better sever for production or/and even use Docker.


