

In the past, we have provided examples of how to build a Flask Rest API, how to build and deploy a Machine Learning Web App and how to deploy a Flask API with Digital Ocean. Today, we will provide a hands-on example of how to deploy flask applications of Machine Learning Models into AWS with Elastic Beanstalk.
A Use Case Scenario
Assume that you work as a Data Scientist and you built a Machine Learning Model that you want to share with other people. The most common way to share your model is with a Flask Restful API but you will need a server. For this case, you can use the Elastic Beanstalk, which is the fastest and simplest way to deploy your application on AWS. You simply use the AWS Management Console, a Git repository, or an integrated development environment (IDE) such as Eclipse or Visual Studio to upload your application, and Elastic Beanstalk automatically handles the deployment details of capacity provisioning, load balancing, auto-scaling, and application health monitoring. Within minutes, your application will be ready to use without any infrastructure or resource configuration work on your part.
Build the Flask API
In another post, we have provided an example of how to run sentiment analysis in Python. Let’s assume that we have been asked to build an API which takes as an input a text and it returns the sentiment, if it is Positive, Negative, or Neutral. For this task you should create a new environment and then freeze it by creating the requirements.txt file.
The application.py file is the following:
from flask import Flask, request, jsonify
from vaderSentiment.vaderSentiment import SentimentIntensityAnalyzer


analyzer = SentimentIntensityAnalyzer()


application = Flask(__name__)

def get_sentiment(my_text):
    vs = analyzer.polarity_scores(my_text)

    sentiment = ''
    if vs['compound'] >= 0.05:
        sentiment = 'Positive'
    elif vs['compound'] <= -0.05:
        sentiment = 'Negative'
    else:
        sentiment = 'Neutral'

    return(sentiment)


@application.route("/endpoint", methods=['GET','POST'])
def sentiment_endpoint():
    if request.method == 'POST':
        json_dict = request.get_json()
        if 'my_text' in json_dict:
            result = get_sentiment(json_dict['my_text'])
            return jsonify({'output' : result})
        else:
            return jsonify({
                "status": "failed",
                "message": "parameter 'my_text' is required!"
            })

    if request.method == 'GET':

        my_text = request.args.get('my_text')
        result = get_sentiment(my_text)
        return jsonify({'output' : result})


if __name__=='__main__':
    application.run()
So we let’s see if our API works as expected locally.
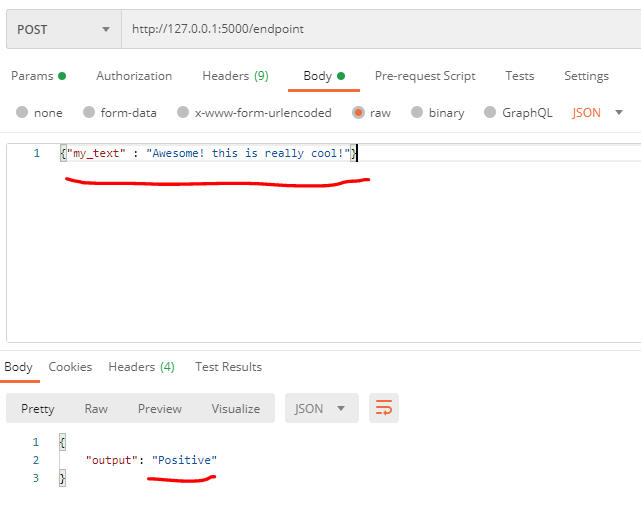
Test a POST request using Postman
We will give as input the “Awesome! this is really cool!” and we get as output Positive
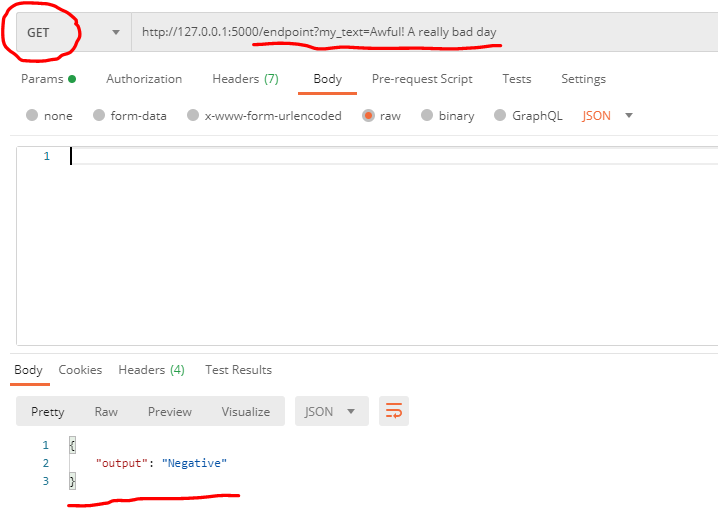
Test a GET request using Postman
We will give as input the “Awful! A really bad day” and we get as output Negative
Requirements
Since we confirmed that the API works, we are ready to deploy it. The last thing that we will need to do is to create the requirements.txt files tying the command in our environment:
pip freeze > requirements.txtThe requirements.txt file is the following:
certifi==2020.12.5
chardet==4.0.0
click==7.1.2
Flask==1.1.2
idna==2.10
itsdangerous==1.1.0
Jinja2==2.11.3
MarkupSafe==1.1.1
requests==2.25.1
urllib3==1.26.3
vaderSentiment==3.3.2
Werkzeug==1.0.1
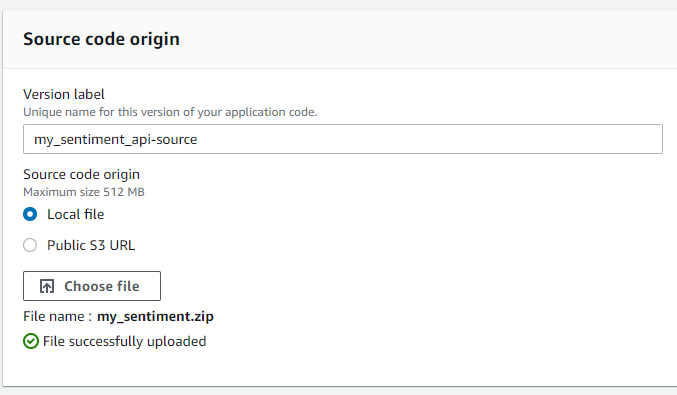
Finally, we will need to create a zip file that contains the application.py and the requirements.txt files and we will upload it to the Beanstalk. Important note: Within the zip file should not be any other sub-folder because the beanstalk will not be able to find the files.
Deploy to Elastic Beanstalk
We will need to sign in to AWS Console and go to the Elastic Beanstalk. We click on the orange button “Create Application“. For the application name, we can type my_sentiment_api. For the platform, choose Python and for the application code, upload the .zip file that you have created above.

Then click on Create Application and wait for around 5 minutes. Then, the API will be running and we get the API URL:

Let’s see, if we can send a request using the URL. We will test it with Postman. Let’s try this text: “Perfect! We deployed our first API. Amazing“

Calling the Flask API with Python
Since we have deployed an API, it means that everyone can use it. Let’s see, how we can call the API with Python (for eg. POST request).
We will get the sentiment of the following three sentences:
[‘this is cool’, ‘this is awful’, ‘this is my blog’]
import requests, json

def my_post(raw_text):
    url = 'http://mysentimentapi-env-1.eba-5pehk54m.us-east-1.elasticbeanstalk.com/endpoint'
    headers = {'content-type': 'application/json', 'Accept-Charset': 'UTF-8'}
    text = json.dumps({'my_text':raw_text})
    r = requests.post(url, data=text, headers=headers)
    return r.json()['output']


samples = ['this is cool', 'this is awful', 'this is my blog']

for s in samples:
    print(my_post(s))
Output:
Positive
Negative
Neutral
Delete your Elastic Beanstalk Environment
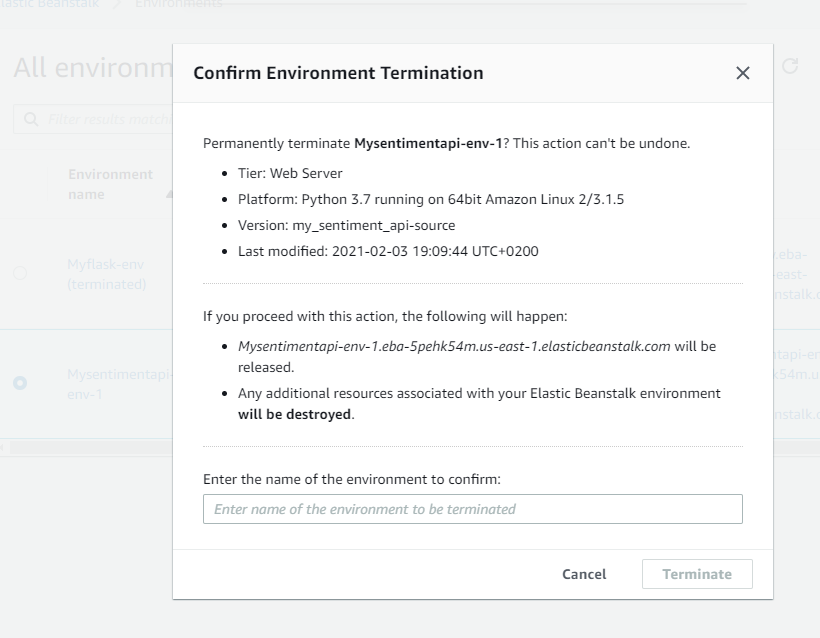
As you know, AWS Elastic Beanstalk is not free. So, in order to avoid any extra charges, you will need to delete the environment.
The Takeaway
Elastic Beanstalk provides an easy way to deploy quick and dirty Flask APIs. Here you can find the steps that we described above and also here you can find more info.


