

In a previous tutorial, we have provided you with an example of how to fine-tune an NLP classification model with Transformers and HuggingFace. In this tutorial, we will show you how to train the model on AWS SageMaker using a GPU instance. Then we can save the model and load it locally, ready for use.
The Dataset
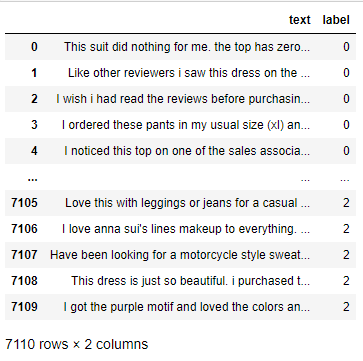
We will consider the womens_clothing_ecommerce_reviews_balanced.csv. The column sentiment has 3 classes:
- -1: Negative
- 0: Neutral
- 1: Positive
Our goal is to build a classifier that takes as input the “review_body” and returns the predicted sentiment.
SageMaker Setup
We will need to run the model on a GPU instance and for this tutorial we used the ml.g4dn.xlarge instance. Now, for the kernel, you should use the “conda_pytorch_latest_p36“. Finally, we will need to install the datasets and transformers libraries.
!pip install datasets transformers[sentencepiece]
Load the Data
The next step is to prepare the data for the training. Let’s load the CSV file first.
import pandas as pd
import numpy as np
import datasets
import transformers


df = pd.read_csv("womens_clothing_ecommerce_reviews_balanced.csv")

df = df [['review_body', 'sentiment']]
df.columns = ['text', 'label']
df['label'] = df['label'] +1

df
Two important things that you should keep in mind:
- The column of the classes should be called “label“
- The label should take integer values like 0,1,2 and so on. In the raw data, the labels were -1,0,1 and we converted them to 0,1,2 by adding 1 to each one. So the 0 is for negative, the 1 is for neutral and the 2 is for positive
Train and Test Dataset
Now we will split our data into train and test dataset using a 50-50 split.
train = df.sample(frac = 0.5, random_state=5)
test = df.drop(train.index)

train.to_csv("train_womens.csv", index = False)
test.to_csv("test_womens.csv", index = False)
Convert them to Dataset Type
We have saved the train and test datasets. Now we will load them as dataset data type.
dataset = datasets.load_dataset('csv', data_files = {'train':'train_womens.csv', 'test':'test_womens.csv'})

dataset
Output:
DatasetDict({
    train: Dataset({
        features: ['text', 'label'],
        num_rows: 3555
    })
    test: Dataset({
        features: ['text', 'label'],
        num_rows: 3555
    })
})
Build the Model
We will build the model by fine-tuning the pre-trained “distilbert-base-uncased” model. Notice that we set “num_labels=3” because we’re dealing with 3 classes. You should adjust this number according to your case.
from transformers import AutoTokenizer
tokenizer = AutoTokenizer.from_pretrained("distilbert-base-uncased")

def preprocess_function(examples):
    return tokenizer(examples["text"], padding="max_length", truncation=True)

tokenized = dataset.map(preprocess_function, batched=True)


from transformers import DataCollatorWithPadding
data_collator = DataCollatorWithPadding(tokenizer=tokenizer)

from transformers import AutoModelForSequenceClassification
checkpoint = "distilbert-base-uncased"
model = AutoModelForSequenceClassification.from_pretrained(checkpoint, num_labels=3)
Create a Function for the Accuracy
We can build a function for the accuracy of the model, where we will return the accuracy of the test dataset after each epoch.
from datasets import load_metric

metric = load_metric("accuracy")

def compute_metrics(eval_pred):
    logits, labels = eval_pred
    predictions = np.argmax(logits, axis=-1)
    return metric.compute(predictions=predictions, references=labels)
Train the Model
Below, we have used our training arguments, but feel free to start experimenting with different values.
from transformers import TrainingArguments, Trainer

training_args = TrainingArguments(
    output_dir="./results",
    save_strategy='no',
    learning_rate=2e-5,
    per_device_train_batch_size=16,
    per_device_eval_batch_size=16,
    num_train_epochs=5,
    weight_decay=0.01,
    evaluation_strategy="epoch"
)


trainer = Trainer(
    model=model,
    args=training_args,
    train_dataset=tokenized['train'],
    eval_dataset=tokenized['test'],
    compute_metrics=compute_metrics,
    tokenizer=tokenizer,
    data_collator=data_collator,
)

trainer.train()

As we can see, it took us 21 minutes to run the model, whereas if we have used a local machine without a GPU we would have needed a couple of days! The accuracy of the model is 70%
Save the Model
Now we can save the model and the tokenizer into one folder. Then we can zip the folder in order to download it and to share it with others.
model.save_pretrained("clothes_models")

tokenizer.save_pretrained("clothes_models")
Zip the folder.
!zip -r clothes_models.zip clothes_models/
Output:
  adding: clothes_models/ (stored 0%)
  adding: clothes_models/special_tokens_map.json (deflated 40%)
  adding: clothes_models/vocab.txt (deflated 53%)
  adding: clothes_models/config.json (deflated 49%)
  adding: clothes_models/pytorch_model.bin (deflated 8%)
  adding: clothes_models/tokenizer.json (deflated 71%)
  adding: clothes_models/tokenizer_config.json (deflated 40%)
Load the Model
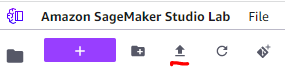
Since we built and saved the model as a .zip file, we can export it locally and ready to use it. So, I have downloaded the zip file and we will use the model on AWS SageMaker Studio Lab which is free. First, I will upload the model.

Then, we will go to the terminal to unzip it.
(studiolab) studio-lab-user@default:~$ unzip clothes_models.zip
Archive:  clothes_models.zip
   creating: clothes_models/
  inflating: clothes_models/special_tokens_map.json
  inflating: clothes_models/vocab.txt
  inflating: clothes_models/config.json
  inflating: clothes_models/pytorch_model.bin
  inflating: clothes_models/tokenizer.json
  inflating: clothes_models/tokenizer_config.json

Then, we open a new Jupyter notebook and we install the required libraries:
!pip install transformers
!pip install datasets
And we load the required libraries as well as the model.
from transformers import AutoModelForSequenceClassification
from transformers import AutoTokenizer
from transformers import TextClassificationPipeline
from transformers import pipeline

load_model = AutoModelForSequenceClassification.from_pretrained("clothes_models")

load_tokenizer = AutoTokenizer.from_pretrained("clothes_models")
Make Predictions
Let’s consider the following three reviews and make predictions.
“Didn’t like the dress. look pregnant in it. this dress is going back.”
“This is a very cute designed shirt but it fits very boxy and runs large.”“The print and fit of this dress is perfect! it’s very flattering and slimming.”
my_pipeline  = pipeline("text-classification", model=load_model, tokenizer=load_tokenizer)


data = ["Didn't like the dress. look pregnant in it. this dress is going back.",
        "This is a very cute designed shirt but it fits very boxy and runs large.",
        "The print and fit of this dress is perfect! it's very flattering and slimming."]

my_pipeline(data)
Output:
[{'label': 'LABEL_0', 'score': 0.9287744164466858},
 {'label': 'LABEL_1', 'score': 0.7738960385322571},
 {'label': 'LABEL_2', 'score': 0.9918407201766968}]
Voilà! The model predicted correctly that the first review is a negative, the second is a neutral and the third one is a positive!


