

There are several reasons why API performance testing is important in data science.
- Speed: API performance is critical in many data science applications, as the API may perform computationally expensive tasks or handle large amounts of data. Poor API performance can lead to slow or unresponsive systems, which can be frustrating for users and negatively impact the overall efficiency of the data science pipeline.
- Scalability: API performance testing can help identify bottlenecks or other issues that may prevent the API from scaling up to meet the demands of a growing user base or larger data sets.
- Reliability: By testing the performance of an API, you can ensure that it is reliable and capable of handling the workload it is designed for. This can be especially important in mission-critical applications where API downtime or slow performance can have serious consequences.
- Debugging: Performance testing can also help identify and troubleshoot issues with the API, such as memory leaks or other issues that may be causing poor performance.
JMeter is a popular open-source tool that can be used to test the performance of APIs, as well as other types of web applications. It is designed to simulate a large number of users making requests to a server and can be used to measure the server’s performance under load.
In this post, I will show you how to create test plans for POST and GET APIs in the simplest way possible.
Installation
To install and run JMeter, follow these steps:
- Download the latest version of JMeter from the Apache JMeter website.
- Extract the downloaded archive file to a location on your computer.
- Run the jmeter.bat (for Windows) or jmeter (for Unix) file. These files are found in the bin directory.
This will launch the JMeter graphical user interface.
Note: You may need to have Java installed on your system in order to run JMeter. If you do not have Java installed, you can download it from the Oracle website.
If you are using MAC OS, you can easily install Jmeter using homebrew running the following:
brew install jmeterThen, you can open it by running:
open /opt/homebrew/bin/jmeteror
open /usr/local/bin/jmeterCreate a test plan for a GET API
For this example, I’m running a GET API locally in 127.0.0.1:8000 that returns the phrase “Hello World”. Now, we want to test this API using Jmeter so we need to create a test plan.
To create a simple test plan in JMeter for a GET API, you can follow these steps:
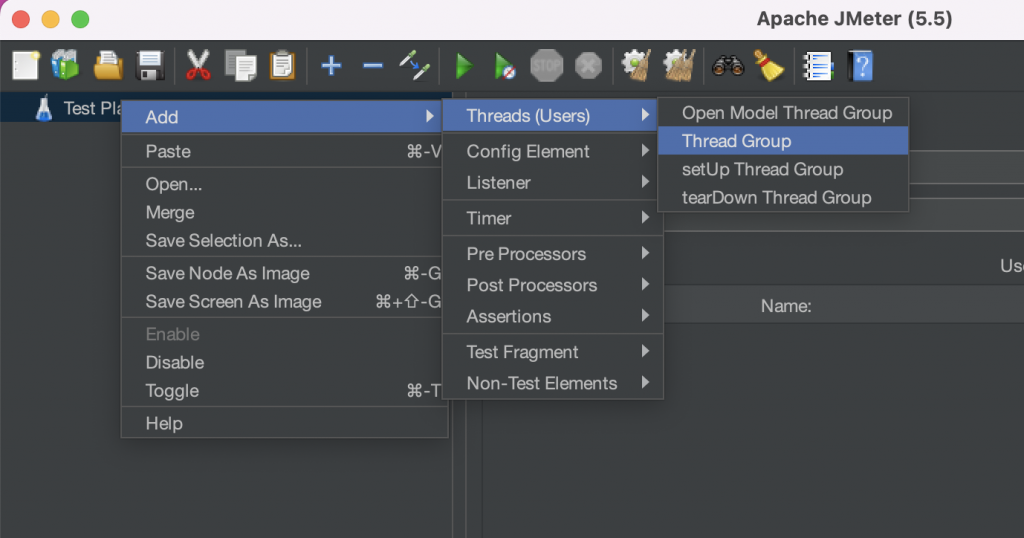
- Start JMeter and create a new test plan by clicking on the “Test Plan” node in the tree on the left-hand side and then selecting “Add” > “Threads (Users)” > “Thread Group”.
2. Add an HTTP request by right-clicking on the “Thread Group” node in the tree on the left-hand side and then selecting “Add” > “Sampler” > “HTTP Request”. This is where the information about the API will be set(URL, Port, etc.).

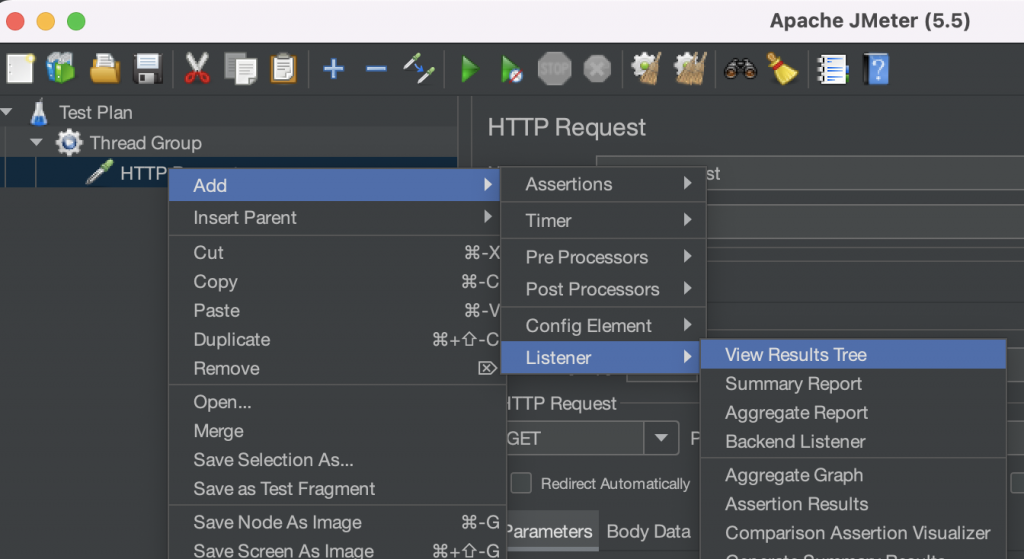
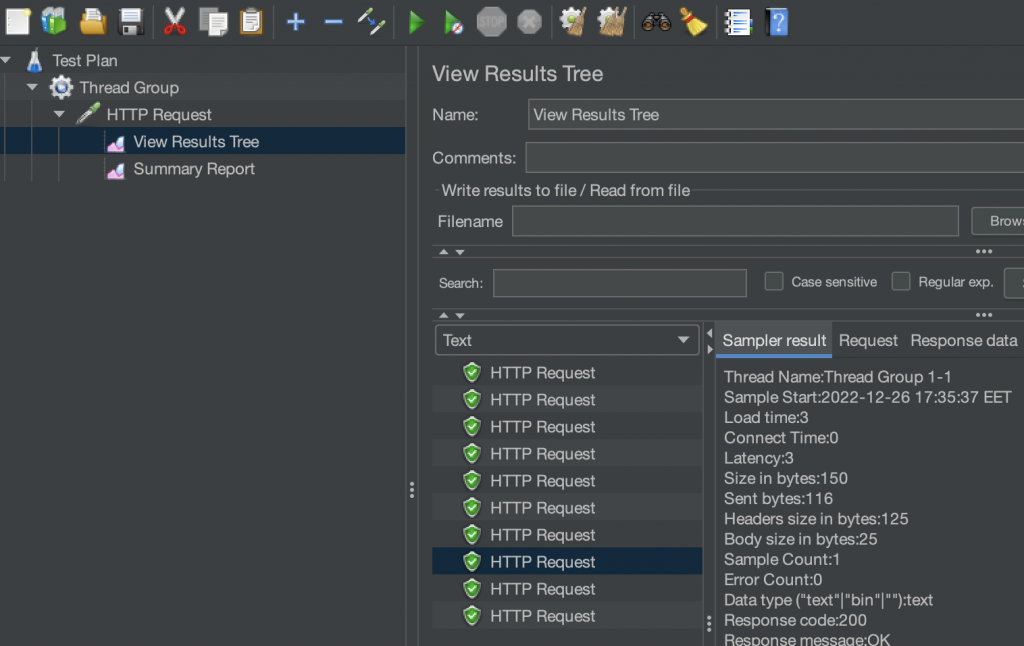
3. Add a Results Tree by right-clicking on the “HTTP Request” node and then selecting “Add” > “Listener” > “View Results Tree”. This allows you to view the results of a test run in a tree format. It shows the request and response data for each sampler(“user”) in the test plan.
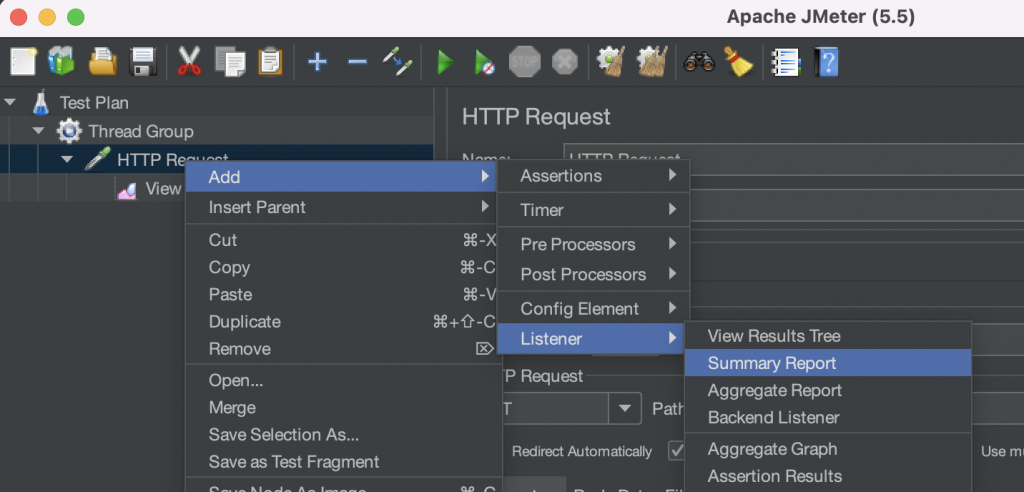
4. Add a Summary Report by right-clicking on the “HTTP Request” node and then selecting “Add” > “Listener” > “Summary Report”. This provides a summary of the performance of a test run. It displays a range of metrics, including the number of samples, the average response time, the throughput, and the percentage of errors.
Setting up and Running the Test
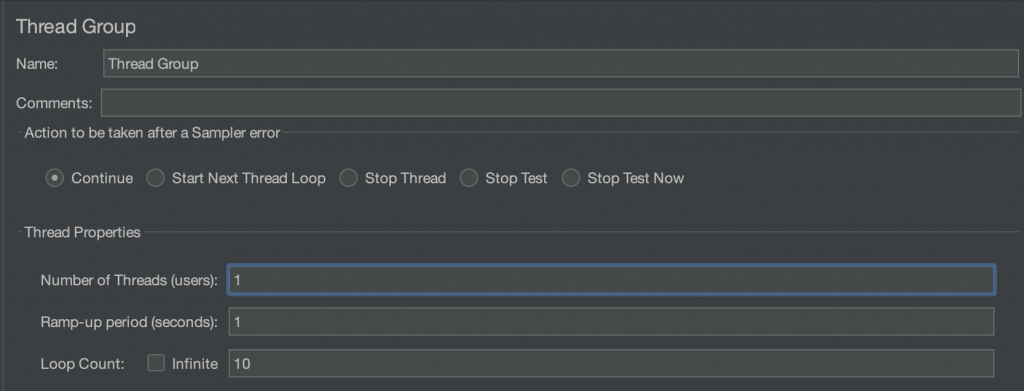
In the HTTP Request, you have to set the URL in the “Server Name or IP” and the Port Number. Also, you have to set the HTTP Request to GET API.

In the thread group, you can set the number of threads which means how many users will call the API. The ramp-up period is the time it takes for JMeter to ramp up the number of threads (virtual users) to the desired level. It is specified in seconds. For example, if you have a Thread Group with a ramp-up period of 60 seconds and a number of threads (users) of 10, JMeter will take 60 seconds to ramp up the number of threads from 0 to 10. Also, you can set the Loop Count which is the number of cycles the thread group will call the API.
For this example I want 1 user to call the API 10 times in a row. That’s why I set the Number of threads to 1 and the Loop Count to 10.
Now we are ready to run the test. Click on “Run” > “Start”. Let’s have a look at the results.

As you can see in the Summary Report, our API calls took 2 ms on average and with 0% Error.
Create a test plan for a POST API
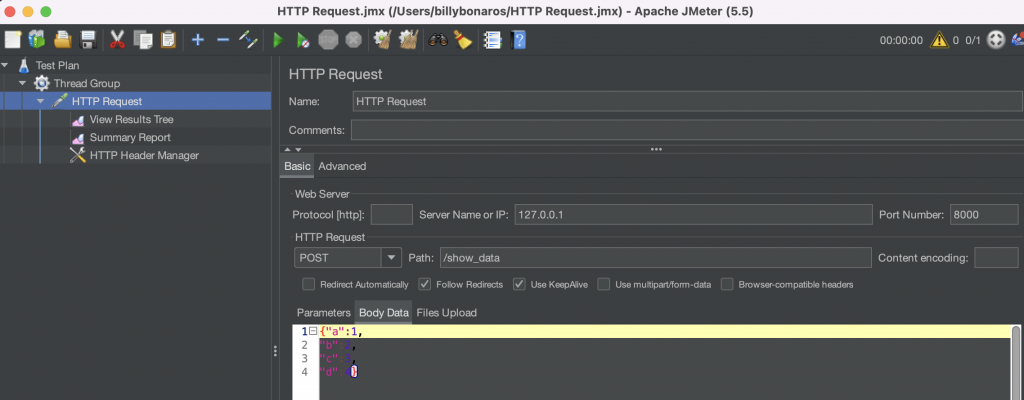
The API in this example gets a JSON input of 4 variables and it returns these variables again.
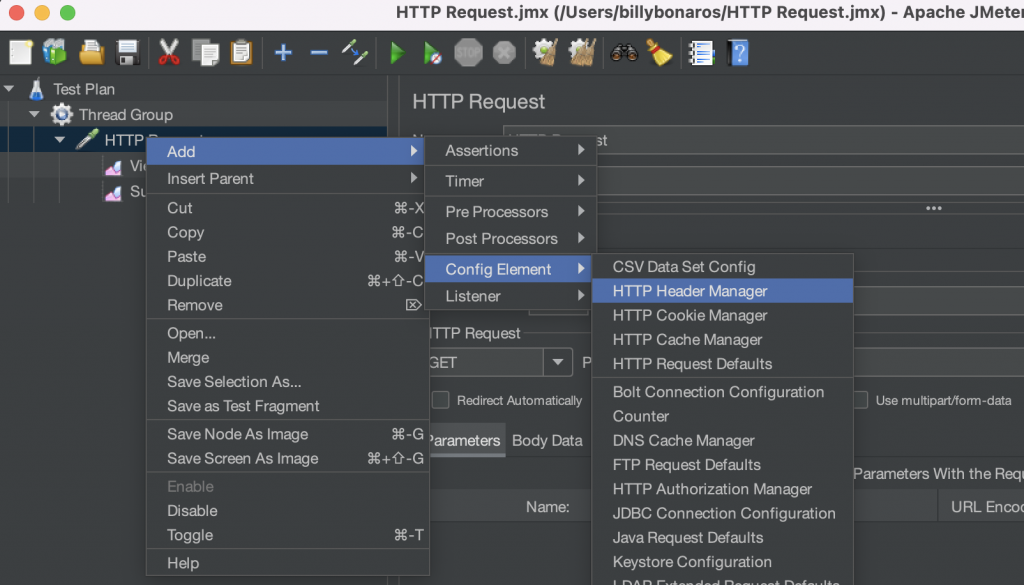
In order to run a test plan for a POST API we have to add the same elements as the GET API plus an HTTP Header Manager.
Let’s first set the HTTP Request. The difference from the GET API is that we need to add the body which is the JSON input. Also in this example, the API runs on the /show_data path.
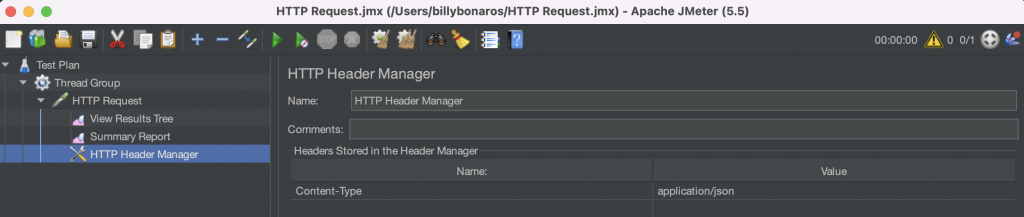
Next, we need to set the headers in the HTTP Header Manager. As you can see below, I added the Content-Type: application/json.
Finally, we are ready to run the test.
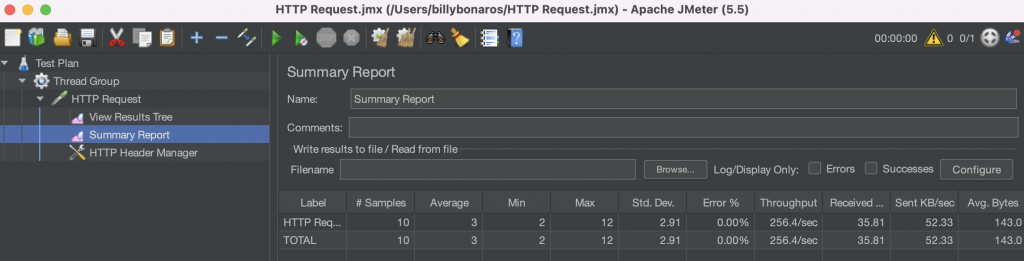

As you can see, this API our API calls took 3 ms on average and with 0% Error. Also, you can see the response of every call in the View Results Tree.
A great feature of Jmeter is that you can save the test plans and which allows you to easily rerun the tests.
Final Words
Overall, JMeter is a powerful and flexible tool that is well-suited for testing APIs and can be a valuable addition to a data scientist’s toolkit.


